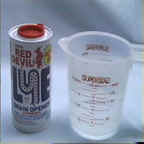
The Simplicity Refining System
Congratulations! You've just purchased the simplest, safest, least expensive and most advanced refining system--The Simplicity Gold Refining System. Please take the time to read both the guarantees and the written instructions thoroughly and view the video. Because the written instructions are updated more often than the video, there are usually differences between the two. Wherever there are differences, use the written instructions, since they are always more up to date.
Warranty
All Simplicity Refining Systems purchased from Shor or an authorized Shor agent are warranted against defective parts and workmanship for as long as the purchaser owns the system. We will repair or replace (at our option) any parts that fail because of defects (at no charge except for shipping and handling). This warranty does not include damage caused by abuse or misuse and in no event shall we be liable for any incidental or consequential damages due to any cause whatsoever. Be sure to fill out and return your warranty card.
Contract to Use the Simplicity Process
The Simplicity Process of refining is patented worldwide. In return for purchasing, from Shor or an authorized Shor agent, the Simplicity Refining System and its supplies, Shor hereby grants the buyer the right to use the Simplicity Process.
Use of equipment and/or supplies not purchased from Shor or an authorized Shor agent in the refining of gold by the Simplicity Process constitutes a breach of contract and automatically revokes the buyers right to use the process.
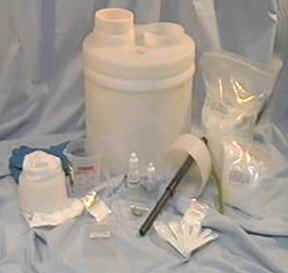
Simplicity Refining System Operating Instructions
For Industrial Use Only
Introduction
All products should be user friendly (easy to use even when you have no experience). We have endeavored to achieve that with the Simplicity Refining System and with these instructions. However, no matter how much or how little refining experience you have, this process will be totally new to you. So when using it for the first time, as with any unfamiliar process, it may appear more complicated than it really is and require several hours to operate.
After using it 2-3 times, you'll become familiar and comfortable with its operation and by then the Simplicity should require only about 30-45 minutes of total labor time to operate and be very simple. Just take it easy, take your time and don't be overwhelmed by the instructions. The process is very forgiving. At least 50% of new Simplicity users make some kind of mistake the first few times they operate the system. Yet they all end up with 99.95+% purity with no losses. You can do lots of things totally wrong and still end up with 99.95% purity with no losses (though the process may take longer and require more of your time).
The important thing is to be comfortable using the system. Just do your best, don't worry too much about making mistakes and call us whenever you have a question--There's no such thing as a stupid question. We will spend as much time with you as you feel you need and there is no limit as to the number of calls you can make to us. Email us at service@ishor.com. If a technician is not available to answer your call at that time, please leave a message and someone will get back to you that day.
Overview
Though the chemistry and the technology which makes the Simplicity possible are very complex, the basic principles and procedure of operating it are very simple:
First, all your metal is dissolved into a salt water bath. Next, the gold content of that metal is turned back into solid form (as tiny particles). The non-gold metals remain dissolved in the salt water. The pure gold "mud" (the tiny brown particles of pure gold) is then rinsed with water, dried and melted. The result is 99.95% pure gold with virtually no losses.
Preparation of The Gold to Be Refined
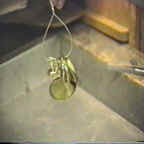
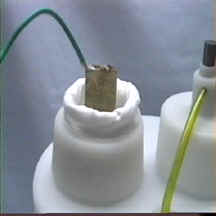
If refining rings: String the rings on a silver wire (sterling or pure silver) of about 10 gage (2 mm) or larger thickness. Copper cannot be used here because it will dissolve very quickly in the salt water. The wire must be long enough to accommodate all your rings and still extend sufficiently to reach the clip of your battery charger or rectifier wire. A section of the silver wire will not be in contact with the rings but will still be in the water. We recommend that you cover this section of wire with heat shrink tubing (included with system). Otherwise the wire will slowly deteriorate in the salt water. We now have a special mesh pouch just for rings. Call customer service if you'd like to order it or learn more about it.
If refining an ingot, button or tree: Solder a length of wire to your ingot, button or tree. This wire should be long enough to reach from the anode pouch in your Simplicity to your battery charger or rectifier. The wire may be of almost any metal--copper, silver or steel are just fine. It can be multistrand or single strand. It must be 10 gage (2 mm) or thicker.
If your wire is not coated, you must insulate this section of the wire from dissolving in the saltwater. We recommend the use of heat shrink tubing (included with system), but plastic tape will work if used generously enough. Don't forget to shrink the heat shrink.
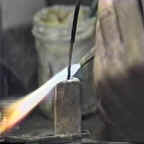
Cover the solder joint with a dab of silicone sealant (a hardware store item). The area must be clean and dry before applying the silicone.
Problems with the Simplicity are fairly rare, even with new users. However, for those new users that run into problems, the most common is a result of high silver content metal. Both 10K and 18K typically have a high silver content. If refining any metal which you suspect has high silver content, you should alloy down to a normal silver content before refining. See: "Preparation of Bench Sweeps..." for more details.
If refining anything that cannot be soldered or hung on a wire, see: "Preparation of Bench Sweeps, filings and small pieces of gold" for more details.
Setting Up
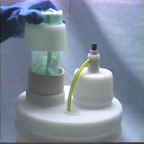
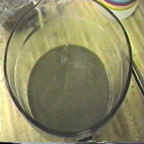
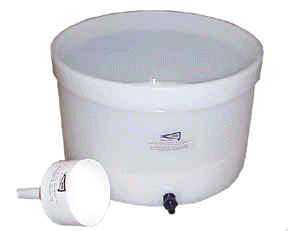
To remove the tank cover, insert a flat-head screwdriver between the cover and the tank. Pry off. Any slight distortion in the tank caused by the screwdriver will disappear shortly. The tank/cover may be a tight fit at first, but will become more manageable as it is used.
Remove from the tank everything except the Cell (don't forget the Precious Metal Detection Liquid bottle, which is in the Scrubber).
To become familiar with the Simplicity, we strongly recommend that you start with small batches (5 ounces or less) for the first 5-6 batches, even if, in the future, you plan to do only large batches (up to a kilo).
To Set up For Small Batches
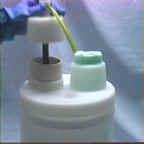
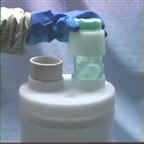
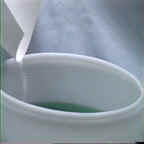
Place the Anode Cap (the cap with the pouch attached) over the GC Cell (the large ceramic cup which protrudes from the top of the tank cover). Place the Cathode Cap (the cap with the graphite rode and hose) over the other 4" opening in the tank cover. Place the end of the Cathode Cap Hose into the Scrubber (the plastic test tube in the tank cover).
To Set up for Large Batches: Reverse the caps
To Review: When refining small batches (5 ounces of scrap or less), the Anode Cap must be over the GC Cell. When refining large batches, the Cathode Cap must be over the GC Cell.
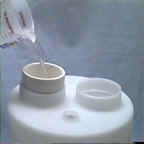
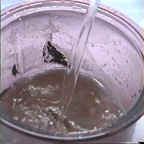
Pour 6 cups of GC Salt into the Tank. . Into the GC Cell, pour 1¼ cups of GC Salt. It's OK, if you want, to pour the GC Salt into the Anode Pouch. When the water is poured over the Salt in the Pouch, the Salt will dissolve and pass through the Pouch.
Pour warm or hot tap water (cold water is OK if hot water is not available) into the Tank until the water level is at the bottom of the groove in the Tank (that's about 2 inches from the top of the Tank Lid).
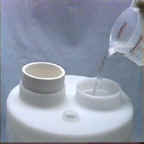
Pour warm or hot tap water into the Cell until the water level is about inch from the top of the Cell (about 2 inches from the top of the Anode Cap). You can mix the GC Salt by hand, but if you have sensitive hands, you may want to wear gloves to prevent the irritation that concentrated salt water may cause to your skin. If your water contains a lot of limestone or you are using a water softener, then you must use distilled water in both the Cell and the Tank or you will damage the GC Cell with your water (it will cause it to flake).
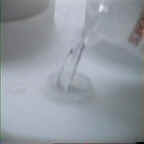
Pour a teaspoon of Scrubpowder into the Scrubber.
Add cold water to the Scrubber until the water level is about inch from the top of the Scrubber. Place the end of the yellow hose into the water. The end should be just barely below the water's surface.
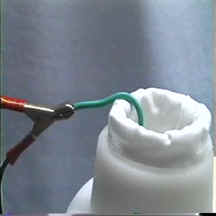
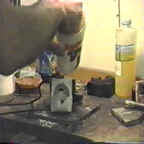
Take the positive (+) lead from your battery charger or rectifier and clip it to the wire from your ingot.
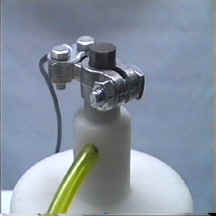
Take the negative (-) lead from your battery charger or rectifier and clamp it to the Cathode (the graphite rod that extends from the top of the Cathode Cap). Be careful to make a tight connection. Poor contact may cause Microsparks. Microsparks. are often too small to see in daylight, but are hot enough to melt the Cathode Cap. Melting of the Cathode Cap is not covered under warranty. This potential problem can be avoided by replacing your battery clip with a battery clamp or by clamping the bare negative wire to your Cathode with a metal hose clamp.
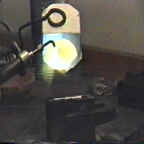
Dissolving The Scrap Gold
To avoid stains, always use gloves when running the Simplicity. 25 amp rectifiers are not made for continuous 25 amp duty (no matter what they say on them). Do not run them much higher than 15 amps continuous. If choosing to use a battery charger, the proper size is 10 amp continuous with a 50 amp fast charger built in. A built in meter showing the full range of amperage is necessary. See the video for an example of an appropriate battery charger. If using a battery charger, the proper setting is 10 amp continuous, not fast charge. Because it has the fast charge built in, the battery charger can run significantly higher than 10 amps when set on the 10 amp setting. If an appropriate battery charger is not available, you can purchase one directly from Shor.
To Dissolve The Gold
Turn on the battery charger or rectifier. If using a rectifier, turn the knob all the way up. It can be turned down later if the amperage rises too high. If using a battery charger, use the 10 amp continuous setting, not the boost.

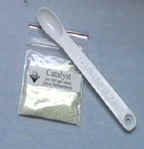
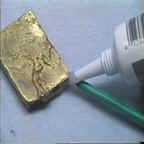
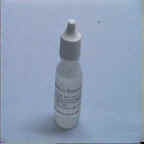
Dip the gold into the water to wet it. On the side of the ingot that will be facing the Cathode, pour one half tsp of Catalyst on the gold and immediately re-immerse the gold in the water. Do not stir the water. The Catalyst will fizz when it hits the wet ingot. For about 5-10 seconds, you may smell a strong chlorine/ammonia odor. This odor will quickly disappear and the Simplicity should run without odor. If the unit does not run odor-free, consult the trouble-shooting guide .
The presence of an odor is an indication of something wrong that should be corrected. If the odor is a bleach type odor, then allowing the odor to continue for many hours will:
- significantly slow the refining process
- make a smell
- cause the OdorFree Precipitant to not be odor free
- retard the ability of the precipitant to do its job
- turn the pH neutral saltwater into an acid
The presence of an ammonia type odor is merely annoying. However, there is no reason to have any odor at all. If you have an ammonia odor, it means that the scrubber is not doing its job. Make sure the Scrubber Hose is in the water of the Scrubber.
Catalyst should be stored in a cool dry place to maintain its potency. A refrigerator is ideal. When it turns from pale yellow to pure white, it is losing its potency. When it turns mushy, it has lost its potency and should be discarded.
The amperage may start at below 10 amps but should rise above it in 15-30 minutes. The Simplicity is designed to run at between 10-25 amps. Running significantly below 10 amps for an extended period of time will do severe damage to the Cell. Running above 25 amps may overheat the Cathode and cause the Cathode Cap to melt.
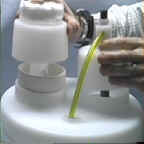
The higher the amperage, the faster the metal will dissolve. At 15 amps, the usual rate of dissolving is about 1 ounce per hour. At 25 amps, about 1½ ounces per hour. Raising the Cathode will lower the amperage. To raise the amperage, slide the Cathode Sheath back up to its original position. As you can see, the amperage can be adjusted by exposing more or less of the Cathode in the water. If using a rectifier, the best way to adjust the amperage is with the rectifier's knob.
As the metal dissolves, the water around the metal will turn green and emit a very mild salt water odor. Though not visible, the water around the metal will turn blue and emit a strong ammonia odor. Occasional bubbles of this ammonia odor will pass into the Scrubber where the odor is neutralized. If bubbles do not appear in the Scrubber after some minutes of running, turn the Cathode Cap slightly till the end of the hose is just barely under the water. Bubbles will appear. You should not experience any odor during the running of the Simplicity.
If you are running a large batch:
TheCathode Cap is on the Cell and will be running the system unattended for many hours (for example, overnight), replace the water and Salt in the Cell before leaving. If the saltwater in the Cell is not replaced when the Salt is exhausted, the amperage will drop to about 4 amps. Running at this amperage for an extended period of time will severely damage the Cell (the Cell will flake until it falls apart). Replacing the water and Salt before leaving will prevent this. The Simplicity can be run about 16 hours before the Salt in the Cell is exhausted and must be replaced. Please note: When pouring off the exhausted saltwater, do not pour off any brown particles you may find in the Cell.
If you are running a small batch (5 ounces or less):
You will not need to add additional Salt and do not need to be concerned about the Salt becoming exhausted unless you don't change the Tank's saltwater after doing 6 batches.
If the water becomes low in the container in which the Cathode is located, you can add water at any time. However, never add water to the container in which the metal is dissolving once the dissolving process has begun. Adding water or washing the gold with water may cause a hard white coating (called copper hydroxide) to form on the ingot. That coating will severely reduce the amperage and effectively stop the dissolving process.
Precipitating the Pure Gold
OdorFree Precipitant should be stored in sealed plastic bag (it may turn hard in the bag but that's OK). Prolonged exposure to air, however, will cause the Precipitant to dry out and change from a crystalline white to a powdery white. If the Precipitant has changed from a crystalline white to a dry and powdery white, it has been rendered ineffective and should be replaced.
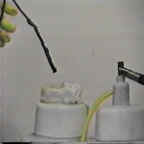
When the metal has finished dissolving, the amperage will be zero or near zero. This natural drop in amperage will not harm the Cell. This drop in amperage is a signal that it is time to precipitate the pure gold. Turn off your battery charger or rectifier. Remove the positive lead from the Simplicity.
To Precipitate When Using the Small Batch Technique
(If you dissolved your metal inside the cell)
Remove the Anode Cap and take out the Cell. Be sure that the Anode Pouch has finished dripping before removing it completely from the Cell. The green water dripping from the pouch contains dissolved gold, so if drops are lost, gold is lost. Do not squeeze the Pouch. Squeezing the Pouch may affect the purity of your gold since non-gold particles may be squeezed through the Pouch.
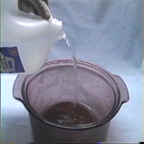
Pour the water from the Cell into a 2 liter or larger Visionware pot, or plastic container. Can't find Visionware in your area? Call 1-888-246-2737, for a Visionware distributor in your neighborhood.
Do not use a metal container.
All plastic and glass containers have a slight static electric charge, especially in winter and in dry climates. This charge may cause a very small amount of gold (a fraction of a gram) to float on the surface of the water or cling to the sides of the container when the Precipitant is added (sort of a gold leaf effect). This charge can be mitigated or eliminated by spray the container with Static Guard before pouring the water into the container (alternatively, you can add a drop of liquid soap to the water if gold floats on the surface).
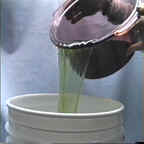
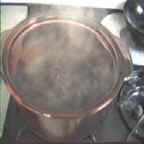
When the dissolving process has finished, the water will be hot (about 120°-140° F.). Pour the water out into a container that you will use to heat your water to boiling (the Cell contains about 2 liters of water). Visionware is excellent for this purpose but a Pyrex coffeepot will also work (please note that you should never put a glass container on a preheated hotplate- it will break). Can't find Visionware in your area? Call 1-888-246-2737, for a Visionware distributor in your neighborhood. If you use a microwave to heat the water, you can use a plastic container. In any case, do not use a metal container. Heat the water to a rolling boil. Measure out the total amount of OdorFree Precipitant that you will use. Turn off the heat.
For every ounce of metal (not just gold content) that is dissolved in the water, measure out 2 tbsp. (tablespoons) of OdorFree Precipitant.
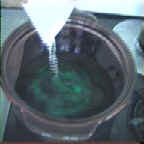
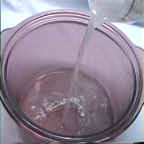
Add the Precipitate to the water slowly, stirring as you add it. If the water has been acidified by working with an ingot that is high in silver or platinum group metals, the water will foam and make an odor (under normal conditions, it doesn't foam and it is odorless).
The color of the water will turn a muddy brown. Let the gold particles settle and test for the presence of dissolved gold. While waiting for the gold to settle, you can prepare the Simplicity either for storage or to run another batch.
To prepare the Simplicity for the next batch, just replace the Salt and water in the Cell and put the Cell back in the Tank. To prepare the Simplicity for storage, just place the empty Cell back in the Tank. When you are ready to do the next batch, you may find that, during storage, some blue water migrated into the Cell. That's ok, just add less water when preparing for the next batch.
The water and Salt in the Tank needs to be replaced only once in every 6 refining batches. At that time, pour off and discard the blue, ammonia smelling water in the Tank. There will be no metal dissolved in the blue water. There will be some brown muck in the tank. Although this spongy brown material looks like precipitated pure gold, it is not and should never be mixed with the pure gold.
Precipitating When Using The Large Batch Technique
(If you dissolved your metal inside the tank, not in the cell)
Remove the Cathode Cap and Cell from the Tank. Pour off the blue, ammonia smelling water and discard it. There will be some brown metallic sponge that "bled through" the Cell wall and plated on to the Cathode. Despite its resemblance to precipitated fine gold, this material is just base metals and it should never be mixed with the fine gold.
Remove the Anode Cap, allowing sufficient time for the Anode Pouch to drain into the Tank (do not squeeze the Pouch!), put the cap on a piece of plastic or a cup so that any of the green liquid that may drip from it will not be lost (this green water contains dissolved gold).
When the dissolving process has finished, the water will be hot (120°-140° F). If you cannot heat the solution to boiling, use Storm Precipitant instead of OdorFree (Storm Precipitant will have a strong odor). For rapid precipitation, it's important to add the precipitant immediately. It is preferable, if possible, to heat the solution to boiling just before precipitation and then add OdorFree Precipitant. A microwave, if available, can be used to heat the solution.
To Precipitate When Using the Large Batch Technique
For every ounce of metal (not just the gold content of the metal) that is dissolved in the water, add 2 TBSP. (Tablespoons) of OdorFree Precipitant. If using Storm Precipitant, add 1½ tablespoons.
You may find that a thin layer of gold, like gold leaf, forms on the surface of the water. When this happens, it is a result of static electricity. Most commonly, this happens in cold or dry climates. If you wish, you can mitigate this effect by spraying the surface of the water in the Tank with Static Guard or adding a drop of liquid soap.
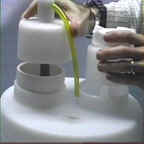
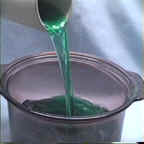
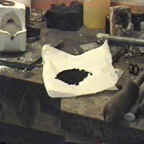
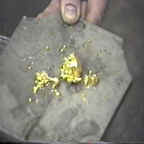
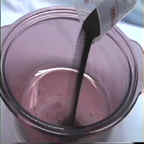
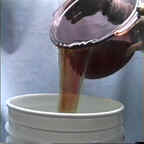
When the Precipitant was added, the water changed from a green color to a muddy brown. The muddy brown color is from the particles of pure gold "raining" out of the solution. Yes, this brown "mud" is pure gold. It will not regain its characteristic beautiful gold color again until it is melted.
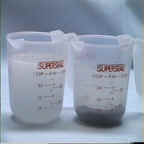
Testing For The Presence of Dissolved Gold
To ensure that when you pour off your waste water, you're not pouring off dissolved gold, you must test for dissolved gold. This test will detect the presence of as little as 4 parts of dissolved precious metal in 1,000,000 parts of water (less than 1/1,000 gram per batch). It will not detect the presence of particles of gold.
To Test:
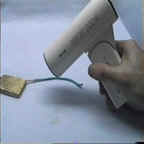
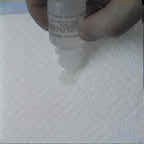
Place a drop of Precious Metal Detection Liquid on a paper towel.
Using your pipette (the big eye dropper) take a sample of the water in which you precipitated your gold. Put a drop or two on the paper towel.
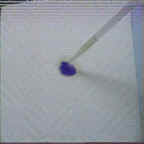
If dissolved gold is present, the color will turn purple-brown or purple-brown-black. If it turns any of these colors, add some more precipitant or give it more time or heat the water.
The colors yellow, orange and red indicate the presence of an insignificant amount of platinum group metals, White indicates the presence of dissolved silver.
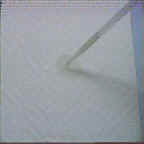
If no dissolved precious metal is present, the color will not change
Clean the pipette after each test.
Precious Metal Detection Liquid loses its potency after about one year and should be replaced annually.
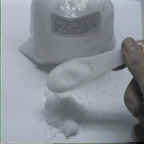
Washing And Drying The Pure Gold
Wait for the water to lose its muddy appearance and the brown particles of gold have settled to the bottom of the water. Then pour off the water. When pouring off the waste water, you don't want to be pouring off particles of gold. The gold is heavy and should all settle to the bottom.. If you want to use a filter, you can use two coffee filter papers in a coffee filter holder or, even better, use a Shor Buchner Funnel with a aspirator.
When all the water has been poured off, the gold mud still has some water clinging to it. This water contains dissolved metals and salts and must be thoroughly rinsed away or the gold will have impurities in it. Fortunately, rinsing it is easy and there is a simple test your rinse.
To Wash:
Cover the gold mud with 1-2 liters of hot tap water. Stir and let the mud settle to the bottom. Pour off the water after the particles of gold have settled to the bottom. Be careful not to pour any brown particles off with the water. If you feel the need, you can use a filter. Repeat this washing with hot tap water another 2-3 times.
After pouring off the water from your last rinse of the gold mud, put several drops of aqua ammonia (supplied with the system) directly on the gold mud. Look for a color change to blue. If you see any indication of a color change, then wash the gold mud once or twice more and then test again. When you see no color change, it means that all the dissolved metals have been washed away and your gold is 999.5% pure. The color of the mud will vary depending upon the size of the particles and other factors. The mud's color is unimportant.
Give your gold mud a final rinse with distilled water.
You can now either allow the gold to air dry or you can rinse the gold mud into a beaker, pour off the excess water and put the beaker on a hotplate to dry. Do not preheat the hotplate or the beaker may crack.
When thoroughly dry, you can melt the gold. If using a torch, wrap the gold powder in tissue paper and soak it in alcohol. That will hold it together long enough for your torch to melt it without blowing the brown particles away.
Once melted, the gold will again take on its characteristic beautiful color. Compare this color with a piece of gold that you know is pure. The color should be identical. If you have an odd color on just one side or have experienced some discoloration when making shot, then your gold has picked up some discoloration either from your ingot mold or from the minerals in your water. Scratch the surface to confirm that the discoloration is only on the surface. To remove this surface discoloration, heat the shot or ingot with a torch (not to melt it, just to get it hot) and sprinkle the surface with a small amount of the supplied ammonium chloride. As the ammonium chloride vaporizes it will take the discoloration with it.
END OF REFINING PROCEDURE
After Refining
Losses of Gold
Unless you are literally throwing gold away, you should experience zero losses. However, you will experience "apparent losses".These are not true losses. this metal is left behind in the system, in the Pouch). When the material in the Pouch is recovered, the gold will be recovered.
Maintenance
The Simplicity should be stored fully assembled. Store the Cell empty in the refining tank. The tank should always be filled with water. Do not wash the Cell. Washing may damage the cell. If you want to rinse the Cell, rinse it in warm water and then immediately immerse, empty, it in the water in the Tank. When you are ready for your next refining, you may find a blue ammoniated water and some brown particles in the bottom of the Cell. This is normal. Just pour this back into the Tank. The Pouch should not be allowed to dry out. Leaving it in its normal location in the Cell or Tank will keep it moist. If the Pouch is allowed to dry, it may deteriorate or rip.
Recovery of Other Metals From Your Waste Solution
There are a number of metals still dissolved in your waste water (copper, zinc, silver, sometimes nickel and trace metals). Their value, including the silver, is only pennies. However, you can easily retrieve them if you wish. The silver may be recovered selectively by adding 1 dwt of stannous chloride (SnCl2) for every 2 ounces of silver. The other metals can be recovered together as a group by adding either zinc or aluminum foil to the waste water. The metals will fall out of solution within a few minutes if stirred, within several hours if not stirred. Since the aluminum may cause a smell when added to the water, you may want to add it when under ventilation.
Gold And Other Precious Materials in The Anode Pouch
If refining rings with stones in them, the stones will fall in to the Anode Pouch as the rings dissolve. You will also find little bits of the rings mixed with the stones in the Pouch.
Some fine gold will precipitate during the dissolving process and some of that gold will be found in the Anode Pouch. If the only thing to be found in the Pouch is brown mud (no flakes or other colored materials), then this mud is probably pure gold (however, don't melt it with your pure gold because of the possibility that it is not pure gold). When you have melted this material, you will be able to determine whether it is pure by its color. If the mud has flakes in it (the result of oxidized scrap) or if it has other colors (such as red or orange from platinum group metals), then this mud is not fine and must be rerefined.
We recommend recovering the metal in the Pouch at the time that the water in the Tank is changed (once every 6 batches when using the small batch technique). However, you can recover it whenever you feel like it.
If red or orange powder is to be found in the Pouch material, put the powder aside in a jar. When you have accumulated several ounces of this material, call Shor for the procedure on how to refine it.
If you have flakes mixed with the pure gold powder in the Pouch, these flakes are from oxidized scrap that did not dissolve. Deoxidize this material by treating it in the same manner as bench sweeps(described on page 7). If it is convenient, you can mix the Pouch material with bench sweeps before cleaning them in the lye/water procedure.
How to Recover Gold From Cyanide Waters like Spent Bombing & Stripping Solutions
There are many highly effective techniques for recovery of metal from plating, stripping and bombing solutions. These methods include: electrolytic recovery, chemical reduction, ionic transfer and other methods. Shor can provide you with all these methods of recovery. However, the least expensive of these methods is ion exchange via zinc foil.
The zinc foil technique is very simple. take a length of zinc foil (available from Shor) and hang it in your cyanide waters. If you have a lot of solution, you may want to hang several strips. You can speed up the process considerably by stirring the water automatically with a submersible pump, automatic stirrer or even an aquarium pump. As the cyanide water flows across the foil, an ion exchange reaction occurs-- some of the zinc dissolves and the karat gold comes out of the water and adheres to the zinc foil. After testing for the presence of dissolved gold (using Gold Detection Pills, available from Shor), remove the zinc foil and, using a paper towel, wipe the gold off the foil. The foil, if not too thin at that point, can be reused to recover gold from your next cyanide bath. The recovered gold will not be pure and must be melted and put into a future batch to be refined in the Simplicity.
Before you neutralize the cyanide and discard the waters, you must test to insure that no gold is left in solution. Once the cyanide is neutralized, the gold is locked into solution, so it's essential that it is all recovered before neutralization. To test, scrape a small amount of gold detection pill on to a paper towel. Add a drop of the cyanide water. If any gold is left in solution, the water will change color. If you see no color change, all the gold is recovered. Keep Gold Detection Pills in a cool place or they will deteriorate and become ineffective.
To destroy your cyanide, see our web page on How to Destroy Cyanide. Discard in accordance with local regulations.
Preparation of Bench Sweeps, Filings and Small Pieces of Gold
This procedure is not for polishing sweeps.
The following procedure will remove all organic material (rouge, shellac, rubber etc), remove iron filings and deoxidize your sweeps.
Make a 50/50 solution of lye and water (for example; add 12 ounces of lye to 12 fluid ounces of water). Draino is not pure lye and should not be used. Lye is corrosive and you should were gloves and eye protection when using it.
Add your bench sweeps to a beaker or similar container.
For every 100 ml of bench sweeps add 500 ml of the lye-water mixture that you made. Heat this to simmering and simmer for 30-60 minutes.
Let the water cool to room temperature and then pour off the water making sure that you do not pour off any particles. Add 1 liter of water and stir. Let the sweeps settle and then pour off the water. Repeat this rinsing procedure and then dry and melt. If you have a significant iron or steel content, pickle your sweeps (at boiling temperature) before drying and melting.
To melt with a torch, wrap the bench sweeps in tissue paper, soak this in alcohol and use a Burno style crucible. If using electric or induction melting, wrapping and soaking is not necessary.
If you think your metal may have a high silver content (higher than 6%), or if you believe that your sweeps has a platinum group metal (platinum, palladium, etc.) content, then you should alloy down with ASR alloy (available from Shor). Platinum group metals do not dissolve in the Simplicity, and silver, in percentages higher than 6%, does not dissolve. . Instead, these metals form a coating (creamy white for silver, orange for palladium, red for platinum). This coating inhibits the dissolving of the gold, slowing down the dissolving process and creating a bleach type odor. It causes the OdorFree Precipitant to emit an odor and to loss some of its precipitating ability.
If you choose to alloy down with ASR, we recommend a ratio of 1 weight of ASR for every weight of scrap metal.
Troubleshooting Guide
Click to expand answer.
Bleach type odor coming from the ingot and the ingot is dissolving slowly. [+]
Cause: One or more of the metals in your ingot is not dissolving. To determine which metal(s), briefly remove and inspect your ingot. The ingot will be coated with a soft covering. The color of that coating will determine the metal(s) not dissolving:
- A white, gray, yellow, or green coating means very high silver content (higher than the normal 5-6% in 14 K yellow).
- An orange coating means palladium content. Palladium is an all too common substitute for white gold.
- A red coating means platinum content.
- A thick brown coating (thin brown is normal) means that the pure gold content of the karat gold is not dissolving.
Solution: If the coating is white, gray, yellow, green, orange or red (silver, palladium or platinum), then remove your ingot, remelt it with 1 ounce of ASR or pure gold for every ounce of metal in your ingot.
If the coating is brown (gold), then you have experienced some problem with your Catalyst. If your Catalyst has deteriorated, discard and use fresh Catalyst. A sign of a loss of potency is a change from yellow to white. When completely deteriorated, it will become damp or wet. If the Catalyst looks OK, review the instructions for adding Catalyst and then add it again. Be sure that the current is on when adding it and do not stir the water.
The anode flakes a lot and the metal dissolves slowly. [+]
Cause: The metal in your ingot is very badly oxidized.
Solution: Just allow the system to operate. It won't interfere with the refining process, though you will have excessive material left behind in the Pouch. The flakes can be recovered after the refining is finished (see: Gold and other Precious Materials in the Pouch).
Ammonia odor coming from the ingot. Black coating on the ingot. [+]
Cause: The leads from your rectifier or battery charger are reversed.
Solution: If you've caught this problem with an hour of starting the system, then simply correct the connection of your leads and add fresh Catalyst. If you've let the unit run reversed for a long time, you must replace all the Salt and water in the Cell.
Loss of amperage while doing the large batch technique. Amperage drops to about 4 amps. [+]
Cause: The GC Salt is exhausted.
Solution: Replace the GC Salt and water in the Cell. When pouring off the blue ammoniated water from the Cell.
Loss of amperage and a hard white coating forms on the ingot. [+]
Cause: Adding water to the container in which the gold is dissolving (after the dissolving has begun) may cause copper hydroxide (a hard white substance) to coat the ingot. Washing the ingot with water may also cause this problem.
Solution: Pour out and filter the water in which your gold has been dissolving. Precipitate and recover your gold from that water. Remelt your ingot and start a new batch
OdorFree Precipitant isn't odor free and is less effective than it normally is. [+]
Cause: Running the system with a high silver or platinum group metal content causes the water to become acidified. Acidification of the water, besides causing a bleach odor when running, causes the precipitant to smell and to lose potency when added to the water. In addition it may also interfere, in rare cases, with the test solution results.
Solution: If the water is heated to a rolling boil (and then turned off) before precipitating, the OdorFree Precipitant will work will despite acidification of the water. To prevent acidification from happening in the future, be sure to alloy down with ASR if you have a high silver or platinum metal content.
Polishing Sweeps Reduction to Metal
Standard methods of sweeps burnout are ineffective and produce a product similar in appearance to lava rock, and which is more, rather than less, difficult to refine. The following method requires about the same amount of work as ineffective methods but reduces to sweeps to a material that can be melted to obtain a bar of metal
Polishing sweeps are composed of grease (the binder in polishing compound), sandy grit (the active ingredient in polishing compound), lint (from the buffs) and very tiny balls of karat gold (from the gold that was polished). Sometimes it will also include paper and buffs.
The first step is to remove all organic material. Take the dust and put it in a series of casserole dishes. The dust must not be more than 1" high and it must not be packed into place. This is very important. If sufficient air does not reach the sweeps, they will not burn completely. If there are buffs and large amounts of paper, these must be put aside for a separate burning.
Place the casserole dishes in your burnout oven. You can stack them, but make sure that there is sufficient space for air to freely circulate through them. If using an electric burnout oven, the door must be left slightly ajar so that sufficient air enters the oven.
Burnout at 1350° F until it has stopped smoking and an additional hour has passed. When it has cooled and you examine the sweeps, you should observe no blackness and no lumps. Typically, it is a uniform, light gray, fine sand. If examined a loupe, you will find tiny balls of gold scattered in the sand.
If you attempt to melt at this point, the sand will turn to glass and its sheer volume will overwhelm the metal and microencapsulate the gold (you'll get a lump of black glass will little beads of gold throughout it). To avoid this, you must first remove most of the sand. This is done with lye (also called sodium hydroxide or caustic soda).
Lye is very corrosive, so take the normal precautions that you would take with any corrosive material (wear rubber gloves, eye protection etc.) Make a saturated lye solution by adding just enough water to the lye to cause it all to dissolve. Lye gets hot when you add water, so use cold water. Now, for every cup of polishing sweeps, add 10 cups of lye/water solution. Heat the solution to about 200° F for about 1-2 hours in a stainless pot (do not use aluminum or any other metal- the lye will rapidly corrode aluminum).
Allow to cool to about room temperature. Then carefully pour off the lye/water, being careful not to pour off the gold particles in the bottom. Rinse by filling the pot with fresh water, allowing the gold to settle and then pouring off the water. There will still be a lot of sand but it will not longer be overwhelming. The gold will be visible. Dry by placing the pot back on the hot plate at low temperature.
If melting by torch, first wrap it tissue paper and soak in alcohol. Use a partially covered crucible such as a Burno crucible or a casting crucible. These steps will help prevent the gold dust from being blow about by the torch.
Typical return of gold is 1 ounce per pound of polishing dust. This usually represents an increase in return of from 2-10 times the return over both non-processed and incorrectly burned sweeps (in other words, if you don't know what's in your sweeps, you're losing your shirt every time you send them in).
Refining Platinum Metals in The Simplicity Refining System
Platinum refining in the Simplicity falls into two categories:
- refining platinum that is mixed with gold and other metals, and
- refining platinum alloys, such as iridium platinum.
When refining gold that is mixed with some platinum, follow the normal procedures that are detailed in the standard Simplicity instructions. This will include alloying down with ASR Alloy from Shor to reduce the percentage of platinum group metals. When the refining procedure is completed, there will be a mud left in the Anode Pouch which will be a combination of gold, platinum group metals and, usually, some base metal. The platinum group mud will be red (for platinum), orange or yellow (for palladium), blackish (for iridium). The gold and copper will be brown.
This mud may be removed from the Pouch at any time. However, most shops only remove it at the time when they change the water and Salt in the Tank. That means once every 6 batches, if doing small batches, or every time if doing large batches. Remove the mud from the Pouch as per the standard Simplicity instructions. Put it in a wide mouthed jar. Pour aqua ammonia (ammonia hydroxide) over the mud and cover the jar to reduce the odor of the ammonia. The platinum group metals will dissolve into the ammonia. The gold and copper will not dissolve. Pour off the ammonia into another container. Rinse and recover the gold mud. Add it to the next batch of gold to be refined in the Simplicity.
Add hydrazine to the ammonia to precipitate the platinum. Hydrazine will precipitate all the platinum group metals, but they will precipitate at somewhat different times (sequentially, with about ½ hour separating the conclusion of one precipitation from the intiation of the next).
When refining just platinum metals in the Simplicity, first alloy down with 4 weights of nickel or ASR Alloy for every weight of platinum. Follow the normal procedures for refining in the Simplicity except: 1) Catalyst is not required, 2) be aware that there will be some acidic odor coming from the ingot, 3) since no gold is involved, there is nothing to precipitate from the solution, and, therefore, no gold Precipitant is required, 4) the dissolving process will take slightly longer than 1 ounce per hour, 5) the metal you are refining (the platinum) will not be dissolving into solution, but will be found as a mud in the Pouch.
Recover the platinum mud from the Pouch and dissolve it in ammonia hydroxide. Pour off the ammonia into another container and then recover the platinum with hydrazine as per the above instructions. If palladium is mixed with the other platinum metals, separate and recover it as per the above instructions.
There's no such thing as a stupid question
Ask us about anything. Pick our brains. Shor has introduced into the jewelry industry more new processes and products than all of the other supply house combined. That includes, among other things: the lost wax casting process, modern polishing and dust collection (virtually every polishing and dust collection system in the world is modeled on the first systems introduced by Shor in the early 1950's), ultrasonics, steamers, vibratory finishing, visilapping, in-house gold refining systems (both acid and salt water systems), in-house assay systems, sandblasting, castblasting, plastic injection, diamond faceting, lathe polishing, steam dewaxing, electronic temperature controllers, electronic gold scales, jewelry cameras, airscribing and many texturing processes (including laser finish, bark finish, scratch finishes, etc.) and many other products and process.
So pick our brains, We're happy to answer any questions you may have. We'll even help you with products you have not purchased from Shor. There is no charge or obligation for our assistance.
© 2026 Shor International Corporation & The I. Shor Company. All rights reserved.