Instructions for Cutting Rubber Molds
Equipment and supplies required
- Rubber mold cutting knife (scalpel) or Exacto knife
- Scalpel or Exacto blades
Choosing your Tool
Before cutting, be sure to use a new and very sharp Exacto or surgical blade. Some prefer an Exacto knife with a stiff blade and light round handle for mold cutting. Most people use a scalpel because they are very sharp, inexpensive and easy to change. However, a number eleven surgical blade has too much flex for some people and a stainless surgical handle is very heavy. Not too heavy to work with, but too heavy if you drop the knife into your lap, blade point down—Ouch! It is very important to find the tools you are comfortable with and be extremely careful to cut away from yourself. Many people learning to cut molds cut fingers and hands with a surgical type blade and do real damage.
Video Demonstration
Step-By-Step Process
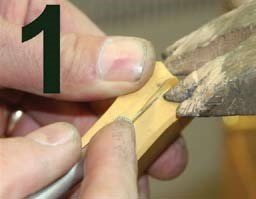
Start by cutting an 1/8" deep cut around the center perimeter of the mold (Photo 1). This is the start point for cutting your "keys" or "mold locks." The "keys" must be cut deep enough so the mold will not slide or slip during wax injection. Rounded keys have a tendency to slip during injection. I have found flat topped keys with sharp corners hold the best during injection, minimizing mold lines in the injected pattern.
Pull the mold open and stretch the rubber where you are cutting. This allows the blade to cut easily without the rubber binding against the blade and allows you to see the target with greater clarity. This method of stretching the rubber not only facilitates easier cutting, but is much safer. Allowing the blade to bind or pinch in rubber that is not being stretched causes you to force the blade through the rubber which puts you in a dangerous position when the blade slips from the rubber mold.
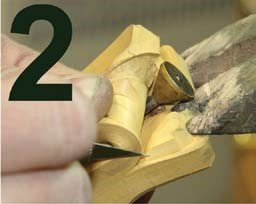
Cut the first two keys near the sprue and usually cut the two keys on the other end of the mold after cutting around the model. To cut a key, lift the edge of a mold half at the perimeter cut I made earlier. Then angle my blade down at about fifty to sixty degrees and cut a slot just inside the mold perimeter about 3/16" to 1/4" deep around the area you want the key. Pulling the rubber further, cut the top of the key parallel to the mold surface and then plunge the blade back down cutting the back side of the key as seen in photo 2.
Cut down the center of the sprue to the model. To prevent unsightly mold lines on the models, I try to cut on the corner or edge of the model, keeping the detail of the inside and outside separated on each side of the mold. This also helps in producing the plugs we will be cutting to help in the removal of the injected model.

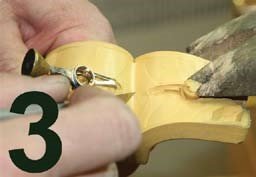
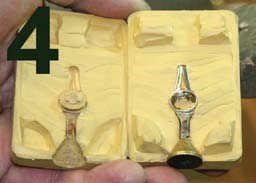
As you come to the body of this pendant, stretch and pull the rubber as far as possible to cut this inside body plug even with the inside top of the pendant. Photo 3 shows the mold halves still attached at one end with the center plug on one side and the pendant on the other side. At this point finish cutting the mold keys at the top of the mold before cutting the pendant from the mold. The mold cut with the keys are seen in photo 4.
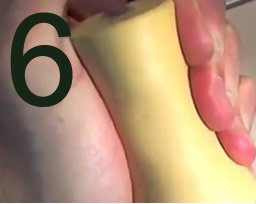
6. Squeeze the sides of the mold as in photo 6 to stretch the rubber and cut only one edge for the bail. Carefully stretch the attaching rubber that forms the filigree and slice it as close to the bail as possible. This will aid in the removal of an injected wax later.
© 2026 Shor International Corporation & The I. Shor Company. All rights reserved.